Christmas in the Country Barn Ring Album + Bonus Tutorial

In my most recent Designer Package from Country Craft Creations, I received three chipboard barn cut outs. I decided to use two of them to create a little Barn Ring Mini album out of the left over designer paper I received last month and some chipboard scraps I had in a bin left over from cutting out bigger album covers. I really like how it turned out and I'm happy to say that I snapped some photos as I was making it do a quick bonus tutorial here on my blog. I did not do a video tutorial for this project as it is pretty simple and easily explained with photos and text. I will show you photos of each finished "page" at the end of this blog post after the instructions. So, here we go...
Instructions for Barn Ring Mini Album
Supplies
- 2 each chipboard barn cutouts (available from Country Crafts Creations in September)
- Medium Ring (I used a Graphic 45 ring from one of their tag sets)
- Alcohol Ink Markers with Brush Tip (I used Copic markers, you could possibly use alcohol stains with a brush. I think paint might be too thick and would hide the details that are cut into the barn.)
- Art Glitter Glue that dries WHITE (Yes this is available or was a few years ago directly from the company that makes the glue. This is NOT the Art Glitter Glue that dries clear that you order from Country Craft Creations. This glue does dry WHITE and when you add glitter when it's wet it makes the best snow!)
- Fine White Glitter
- Art Glitter Glue that dries CLEAR (or other adhesive to attach the designer patterned papers.)
- Medium Chipboard (I used scraps that I had left over from other projects)
- Prima Christmas in the Country A4 Paper and/or 3x4 Journaling Cards (I used paper scraps from other projects and some of the 3/4 cards to cover back sides of barn pieces and the chipboard "pages.")
- Prima Christmas in the Country Chipboard Elements
- Assorted Prima Christmas in the Country flowers
- Graphic 45 Gold Gemstones
- Assorted Ribbons & Trim
- Snowflake Diecuts and/or Stickers
Step 1: Color the front side of one barn as desired. After I colored the roof on mine, I ended up completely covering with "snow" so you would not need to color the roof if you decide to do that. I used Copic Markers with brush tips as it is easier for me to control the coloring with those. You might be able to use alcohol stain with small brushes or other brands of alcohol markers. I colored windows and doors with a dark grey which looks almost black. A nice brown would also look good with this. Of course I colored the side and front of the barn red to closely match the barn in the paper collection.


Step 2: To create the "snow", I used Art Glitter Glue that dries WHITE. I bought this specifically a few years ago to make snow. It works great! You add your fine glitter while the glue is still wet and let it air dry and then tap/brush off the excess glitter. In the photo below I only put glue on the eaves of the barn and along the tops of the windows and doors. Then I decided to cover the entire roof with snow which you see in another photo below. I'm not sure how the dries clear glue would do but you could test it on a scrap and see. If you add enough white glitter it might look just as good as the dries white glue.


Step 3: Cut 5 each medium chipboard @ 2 3/4" wide x 3" tall to create the "pages" of the album and punch a hole in one corner of each page. Cover one side with patterned paper first, then punch the hole. Cover the other side and punch the hole again.
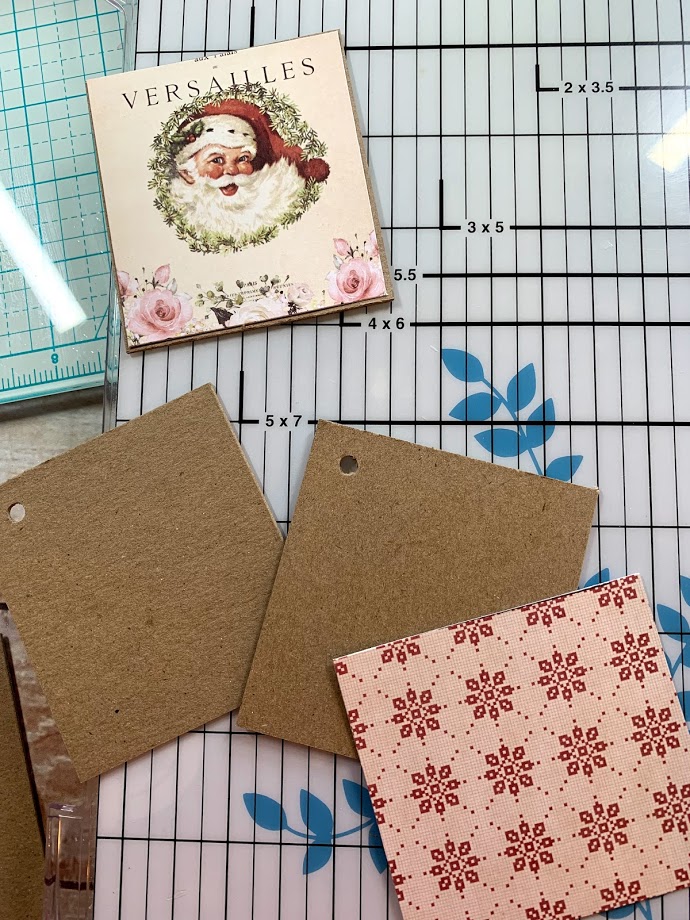
Step 4: Ink the edges with desired ink color and if necessary, use a Sharpie marker or dark gray Copic Marker to color the chipboard edges.


Step 5: Next use the chipboard barn as a template, trace around it on the back side of the patterned paper you want for the back of the front barn and both sides of the back barn for the album covers. Cut out the barn shapes of the patterned paper cutting to the inside of the line and then glue to each barn chipboard piece.

Below is the back of the barn cover piece.

And this is the inside of the back barn piece.

Be sure to punch the holes in the barn pieces for the ring.

Step 6: Decorate the outside of the album as desired with snowflakes and flowers. Tie assorted ribbons on to the ring. Also decorate the inside pages. The photos below show the finished album closed and all the different pages inside of the ring album.


This concludes the bonus tutorial for this little album. Super easy to make and you can do it in about a half a day, longer to let the snow dry.
Happy Crafting!
Sandy

